
Posted by Sr Tech Brian on 13th Oct 2026
Dometic Americana Won’t Turn On (No Panel Lights): Troubleshooting Flowchart
NO PANEL LIGHTS
Dometic Americana Won’t Turn On: No Panel Lights
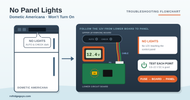
You press the power button and nothing lights up, not AUTO and not CHECK. The control panel runs on 12 volts DC, even when you’re plugged in, so follow the 12 volts from the RV to the lower circuit board, then up to the upper (eyebrow) board to find where it stops.
Dometic Americana & Americana Plus · RM2351 through RM2862
Fits these models
Different model? These steps are for the models above, from Dometic’s service manual for them. For any other Dometic fridge, ask a tech before you test or order parts.
Before you start
- Where things are. The lower circuit board, 12V terminal block and fuses are behind the lower outside vent, under the protective cover. The upper (eyebrow) board is behind the top trim panel above the doors.
- Good voltage is 9.6 to 22 volts DC. Above 22 volts the fridge shuts itself down.
- Plugged in doesn’t matter. With no 12 volts the panel stays dark even on shore power, because the controls run on DC.
- You’ll need a multimeter set to DC volts and continuity.
PART A · 12V TO THE FRIDGE
Is good, clean 12V reaching the fridge?
STEP 1
Check the power button
Make sure the main power ON/OFF button is pressed in to the DOWN (ON) position.
Do the panel lights come on now?
You’re done
The button was off. The fridge should start in the mode you’ve selected.
STEP 2
Measure the DC supply
Measure DC volts across the two incoming wires at the 12V terminal block behind the lower vent.
Is it 9.6 to 22 volts DC?
Fix the RV’s 12V supply
Check the battery, converter, and the fuse or breaker for the fridge circuit in the RV’s DC panel. The fridge needs its own two wires to the battery with the right polarity, and it can’t use the chassis as the ground. Repair the problem, then measure again.
STEP 3
Clean and tighten the connections
Check all four wires at the DC terminal block (two in, two out), and the ground wire all the way back to the battery.
Were any loose, corroded or damaged?
Repair and retest
Clean and tighten them. A loose wire can read good voltage but still can’t carry the current the controls need. If lights go dim or relays buzz, look for another bad connection.
PART B · LOWER CIRCUIT BOARD
Power is reaching the fridge. Is it getting through the lower board?
STEP 4
Check the 3-amp fuse
Pull the 3-amp DC fuse on the lower circuit board and check it for continuity.
Is the fuse good?
Replace the fuse
Put in a new 3-amp fuse and try the power button again. If it blows again, there’s a short in the wiring or a component. Find it before you put in another fuse.
STEP 5
Check the thermofuse
Newer and replacement cooling units have a thermofuse on the boiler, next to the flue. It shuts the controls down if the cooling unit has a problem. Check it for continuity.
Does the thermofuse have continuity?
The thermofuse has opened
Some have a reset button in the center you can push. A thermofuse that opens usually means the cooling unit has a problem and will need to be replaced. It isn’t replaceable on its own. Before you reset it or buy anything, ask a tech.
STEP 6
Measure power into the board
Measure DC volts at the board’s 12V input (+) and J10 (−). The input is J4 on the first-generation and 3850712013 boards, and J1 on the 3850415013 board.
Is there 12 volts at the board?
Fix the wiring to the board
Power is at the terminal block but not at the board. Check the wire and connectors between them, and the thermofuse wiring if your unit has one. Repair them, then measure again.
STEP 7
Measure power out of the board
Turn the main power button OFF. Measure DC volts at the lower board’s Plug 1, terminal 4 (+, orange wire) and terminal 5 (−).
Is there voltage?
Replace the lower circuit board
The fuse is good and 12 volts goes into the board, but none comes out to the upper board. Replace the lower board. Match the part number on your old board’s label.
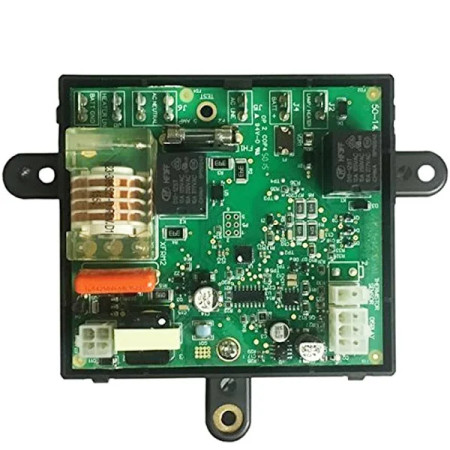 Dometic Hercules Board 3316348.900 →OEM board with built-in reigniter. Replaces 3850712013.
 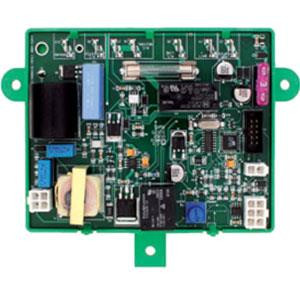 Dinosaur 3850712.01 Board →Aftermarket replacement for 3850712-xxx boards.
 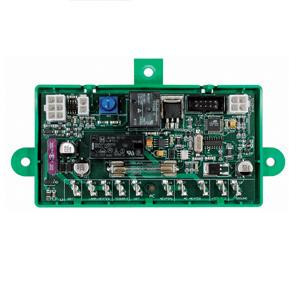 Dinosaur 3850415.01 Board →Replaces 3850415 boards only.
PART C · UPPER BOARD & CABLE
The lower board sends power. Does it reach the panel?
STEP 8
Measure at the upper board
Turn the main power button ON. At the upper (eyebrow) board’s connector, measure DC volts between terminal 4 (+, orange or white wire) and terminal 3 (−, red wire).
Is there voltage?
Replace the cable assembly
Power leaves the lower board but doesn’t reach the upper board. Test the cable between the two boards and replace it if it’s bad.
Replace the upper (eyebrow) board
Power reaches the control panel, but the lights still don’t come on, so the upper board has failed. Eyebrow boards differ by model, so match your old board’s part number. See our Dometic eyebrow boards or ask a tech.
Still stuck? ask a tech with your model, product number and the readings you got. We’ll confirm the part before you order.
Covers the Dometic Americana and Americana Plus: RM2351, RM2354, RM2451, RM2454, RM2551, RM2554, RM2652, RM2662, RM2663, RM2852 and RM2862. Based on the Dometic RM2xxx service manual, Diagnostic Flow Chart, Symptom 1: No operation, no panel lights.