
13th Oct 2026
Dometic Americana Has Panel Lights but Won’t Run: Troubleshooting Flowchart
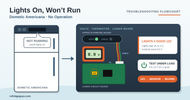
LIGHTS ON, NOT RUNNING
Dometic Americana Has Panel Lights but Won’t Run
The panel lights come on, but the fridge isn’t cooling. There’s no heat at the AC heater and the burner doesn’t light. The most common cause is weak 12 volts, because the panel lights stay on all the way down to 4 volts but the controls need at least 9.6. After that, check the thermistor, the wiring and the lower circuit board.
Dometic Americana & Americana Plus · RM2351 through RM2862
Fits these models
Different model? These steps are for the models above, from Dometic’s service manual for them. For any other Dometic fridge, ask a tech before you test or order parts.
Before you start
- Where things are. The lower circuit board, 12V terminal block and fuses are behind the lower outside vent, under the protective cover. The thermistor is clipped to the fins inside the fridge, and plugs into P2 on the lower board.
- Good voltage is 9.6 to 22 volts DC. Lit panel lights don’t prove it, since they stay on down to 4 volts.
- Test in cooling mode. Dometic says to run every lower board test with the fridge calling for cooling. Unplugging the thermistor makes sure it is.
- You’ll need a multimeter set to DC volts, AC volts and ohms, and a glass of ice water.
PART A · IS IT CALLING FOR COOLING?
Make sure it should be running.
STEP 1
Check the settings and the box
The main power button should be ON and the mode set to AUTO or GAS. On adjustable models, check the temperature setting. Then put a thermometer in the fresh food section.
Is it warmer than about 40°F inside?
It may just be cycling off
When the box is cold enough, the control shuts the heat off until it needs more cooling. That’s normal. Check it again in an hour.
PART B · 12V POWER
Weak 12V is the most common reason for lights with no operation.
STEP 2
Measure the DC supply
With the fridge on, measure DC volts across the incoming wires at the 12V terminal block behind the lower vent.
Is it 9.6 to 22 volts DC?
Fix the RV’s 12V supply
Charge or replace the battery, check the converter, and check the fuse or breaker for the fridge circuit. Above 22 volts the fridge shuts itself down. Repair the problem, then measure again.
STEP 3
Measure at the lower board
Measure DC volts from the board’s 12V input to ground: J4 on first-generation and 3850712013 boards, J1 on the 3850415013 board.
Is it the same as at the terminal block?
Find the voltage drop
Voltage is being lost on the way to the board. Clean and tighten all four wires at the terminal block, and check the ground all the way back to the battery. The fridge needs its own two wires of the right size, with no chassis ground. Dim lights or buzzing relays point to a loose connection.
STEP 4
Check for AC ripple
Set your meter to AC volts and measure across the DC terminal block with a load on the converter.
Is it 6 volts AC or less?
Clean up the power source
More than 6 volts AC on the DC line confuses the control board and causes erratic operation. Repair or replace the converter, or run the fridge on battery power, then test again.
PART C · THERMISTOR
Power is good. Is the temperature sensor telling the board not to cool?
STEP 5
Unplug the thermistor
Unplug the thermistor from P2 on the lower board. With no sensor reading, the board goes into limp mode and runs the cooling unit nonstop.
Does the fridge start running now?
STEP 6
Test the thermistor
Put the thermistor in a glass of ice water (more ice than water, about 33–35°F) for 8 to 10 minutes. Measure ohms across its two wires from the wire side, so you don’t damage the P2 plug.
Is it about 8,000 to 10,000 ohms?
Replace the thermistor
The sensor is reading wrong and shutting the cooling off. Replace it with the Thermistor 3851210025 or the Thermistor Kit 38510590422, which includes the plug and holder.
Check the P2 connection
The thermistor is good, but the board only runs with it unplugged. Check the P2 plug and wires for damage, and make sure the thermistor is clipped to the fins. If those are fine, the lower board isn’t reading the sensor correctly. Replace it as in Step 8.
PART D · WIRING & LOWER BOARD
It won’t run even with the thermistor unplugged.
STEP 7
Check the wiring
Check every connector on the lower board and the cable to the upper board. Look for loose, burnt or corroded terminals, and compare the wiring to the diagram on the back of the fridge.
Did you find a problem?
Repair and retest
Repair the connection, then try the fridge again.
STEP 8
Check the board’s outputs
Leave the thermistor unplugged. On AC: confirm 120V at J5 and J6, then measure for voltage at J7 and J8 to the heater. On gas: measure DC volts at Plug 3, terminal 2 (+, yellow) and terminal 1 (−, white) during the 45-second trial for ignition.
Is the board sending power to the heater or gas valve?
Replace the lower circuit board
Good 12 volts goes in, the fridge is calling for cooling, and nothing comes out. Replace the lower board. Match the part number on your old board’s label.
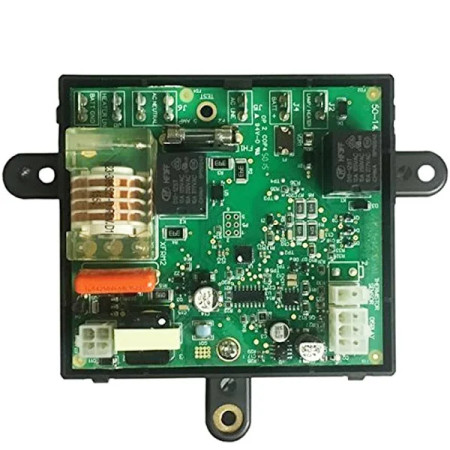 Dometic Hercules Board 3316348.900 →OEM board with built-in reigniter. Replaces 3850712013.
 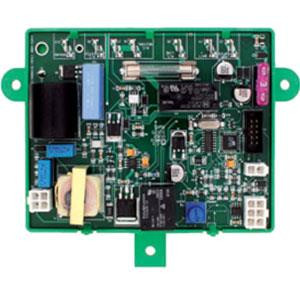 Dinosaur 3850712.01 Board →Aftermarket replacement for 3850712-xxx boards.
 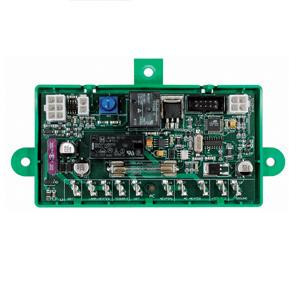 Dinosaur 3850415.01 Board →Replaces 3850415 boards only.
Check the heater or gas system
The board is working. If it sends power to the heater but nothing heats, test the AC heating element: about 44 ohms on the RM2652 through RM2862, or 80 ohms on the RM2351 through RM2554 (±10%). If it powers the gas valve but the burner won’t light, check the gas supply, igniter and electrode.
Still stuck? ask a tech with your model, product number and the readings you got. We’ll confirm the part before you order.
Covers the Dometic Americana and Americana Plus: RM2351, RM2354, RM2451, RM2454, RM2551, RM2554, RM2652, RM2662, RM2663, RM2852 and RM2862. Based on the Dometic RM2xxx service manual, Diagnostic Flow Chart, Symptom 2: No operation, has panel lights.