
13th Oct 2026
Dometic Americana CHECK Light: What It Means and How to Fix It
CHECK LIGHT ON
Dometic Americana CHECK Light: What It Means and How to Fix It
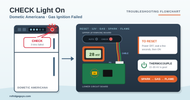
The CHECK light means the fridge tried to light the burner on propane three times and failed, so it shut the gas off. It only comes on in gas operation. Start with a reset, then check the 12 volts, the gas supply and pressure, the spark, the burner jet and the flame sensing.
Dometic Americana & Americana Plus · RM2351 through RM2862
Fits these models
Different model? These steps are for the models above, from Dometic’s service manual for them. For any other Dometic fridge, ask a tech before you test or order parts.
Before you start
- How it gets there. The board tries to light the burner for about 45 seconds, waits 2 minutes to purge, and tries again, up to three times. After the third failure the CHECK light comes on, about 6 to 7 minutes after it started.
- It can run on AC with the light on. If shore power comes back, the fridge switches to AC, but the CHECK light stays on until you reset it.
- Safety first. Never use a flame to check for gas leaks. Gas and spark tests should be done by a qualified service technician.
- You’ll need a multimeter that reads DC volts, millivolts and ohms, and a manometer for gas pressure.
PART A · RESET
Clear the light and watch it try again.
STEP 1
Reset the fridge
Turn the main power button OFF, wait a few seconds, then turn it back ON. Don’t flip it off and on quickly: a hot thermocouple can trigger the CHECK light again. Newer boards wait 30 seconds before trying if the thermocouple is still warm.
Does the burner light and stay lit?
You’re done
After a tank refill, or if the fridge sat unused, air in the gas line is the usual cause. It can take 3 or 4 resets to purge it. If it keeps coming back, go on to Step 2.
PART B · 12V & GAS SUPPLY
The basics the burner needs.
STEP 2
Measure the 12 volts
During the trial for ignition, measure DC volts at the 12V terminal block. Check that the ground wire is clean and tight all the way to the battery.
Is it 9.6 to 22 volts, with good connections?
Fix the 12V supply
Low voltage or a loose ground causes erratic gas operation or none at all. Charge the battery, check the converter, and clean and tighten all four wires at the terminal block.
STEP 3
Check the gas supply
Make sure the tank has propane and its valve is open, other LP appliances work, and the manual shutoff valve on the back of the fridge is open.
Is gas reaching the fridge?
Fix the gas supply
Fill or open the tank and open the fridge’s manual valve. Reset 3 or 4 times to purge air. If it still fails after several tries, stop resetting and keep troubleshooting.
PART C · SPARK, VALVE & PRESSURE
Watch it during the 45-second trial.
STEP 4
Watch for spark
Remove the burner cover, reset the power button, and watch the electrode during the trial for ignition.
Is it sparking?
Fix the spark
Measure DC volts at the lower board’s Plug 3, terminals 2 (+) and 1 (−). No voltage means the lower board has failed. With voltage, check the electrode: no cracks, a 3/16 inch gap with the tip above the burner slots, and a good burner ground. Then test the igniter, or the board itself if the igniter is built in (3850712013 style). The Electrode with Lead Wire 2932781012 fits newer units where the electrode and cable are one part.
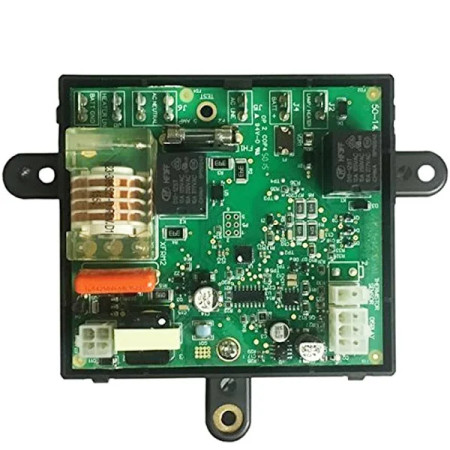 Dometic Hercules Board 3316348.900 →OEM board with built-in reigniter. Replaces 3850712013.
 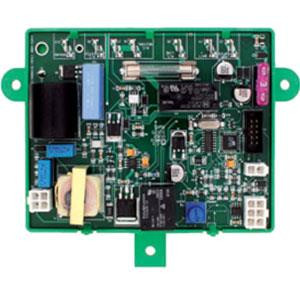 Dinosaur 3850712.01 Board →Aftermarket replacement for 3850712-xxx boards.
 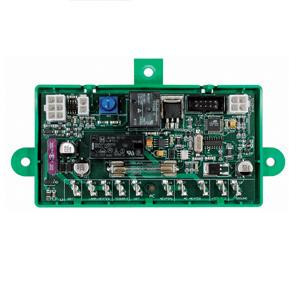 Dinosaur 3850415.01 Board →Replaces 3850415 boards only.
STEP 5
Check the gas valve and pressure
During the trial, measure DC volts at the gas valve terminals, yellow (+) and white (−). Then connect a manometer to the test port below the solenoid valve.
Is there 9+ volts at the valve, and about 11 inches water column?
Fix the valve or pressure
No voltage at the valve with voltage at Plug 3 means a bad wire between them. Low pressure at the test port with 11 inches going into the fridge means the solenoid valve isn’t opening all the way. Its coil should read about 49 ohms. Replace the solenoid valve assembly; for the RM2862 that’s the Gas Valve / Burner / Igniter Assembly 3850730569. Low pressure going in points to the RV’s regulator.
STEP 6
Clean the burner jet and burner
Soak the jet in an alcohol-based solvent for about an hour and let it air dry. Never push a wire or pin through it, or blow air through it. Clean the burner the same way and make sure its slots are directly under the flue. Check the jet size:
| Model | Jet size |
| RM2351, RM2354 | #39 |
| RM2451, RM2454, RM2551, RM2554 | #43 |
| RM2652, RM2662, RM2663, RM2852, RM2862 | #58 |
Does the burner light now?
Fixed
A partly clogged jet is a common cause of a CHECK light. Clean the jet, burner and flue at least once a year.
PART D · FLAME SENSING
It lights, then goes out and the CHECK light comes on.
STEP 7
Test the thermocouple
Units with a separate igniter use a thermocouple to prove the flame. Set your meter to DC millivolts, black lead on J3 (original board) or J4 (current board), red lead on J10 or the other thermocouple lead. Start the fridge on gas.
Does it reach 22 to 36 millivolts within 45 seconds?
Fix the thermocouple
Below 10 to 13 millivolts, the board shuts off the gas and turns on the CHECK light. Center the tip over the burner so it covers 3 slots, clean off carbon, and recheck the gas pressure. Replace the thermocouple if it’s still low. Integrated igniter units have no thermocouple; they sense the flame through the electrode, so check it and the burner ground.
Replace the lower circuit board
The thermocouple proves the flame, but the board still shuts the gas off. Replace the lower board. Match the part number on your old board’s label.
Dometic Hercules Board 3316348.900 →OEM board with built-in reigniter. Replaces 3850712013. Dinosaur 3850712.01 Board →Aftermarket replacement for 3850712-xxx boards. Dinosaur 3850415.01 Board →Replaces 3850415 boards only.Still stuck? ask a tech with your model, product number and the readings you got. We’ll confirm the part before you order.
Covers the Dometic Americana and Americana Plus: RM2351, RM2354, RM2451, RM2454, RM2551, RM2554, RM2652, RM2662, RM2663, RM2852 and RM2862. Based on the Dometic RM2xxx service manual, Diagnostic Flow Chart, Symptom 9: Check light on.