
Posted by Sr Tech Brian on 13th Oct 2026
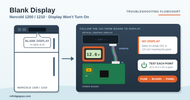
Norcold 1200 / 1210 Blank Display (Won’t Turn On)
BLANK DISPLAY
Norcold 1200 / 1210 Blank Display (Won’t Turn On)
Nothing shows on the control panel and the fridge won’t turn on. Follow the 12 volts from the power board to the optical control display to find where it stops: the RV’s 12V supply, the F1 fuse, the power board, the wire harness or the display itself.
Before you start
- Where things are. The power board is behind the lower outside vent. The optical control display is inside the fridge on the divider between the doors.
- Good voltage on this fridge is anywhere from 10.5 to 15.4 volts DC.
- You’ll need a multimeter set to DC volts and continuity.
PART A · POWER BOARD
Is 12V getting into the board, and out again?
STEP 1
Measure the DC input
Measure across the power board’s 12 VDC and GND terminals.
Is it 10.5 to 15.4 volts DC?
Fix the RV’s 12V supply
Check the DC input wiring for loose or damaged wires and connectors, repair them, then measure again. Low battery? See our low-voltage checks.
STEP 2
Check the F1 fuse
Pull fuse F1 (5 amp) from the power board and check it for continuity.
Is the fuse good?
Replace the fuse
Put in a new 5-amp F1 fuse, then try the power button again.
STEP 3
Check the F1 fuse terminals
Look at the fuse clips where they’re soldered to the circuit board.
Are the terminals loose or broken?
Replace the power board
With loose or broken fuse terminals, Norcold’s fix is a new power board.
 Norcold Power Board 628661 →OEM board for every 1210, and 1200s with serial 8981139 and above.
  Norcold Upgraded Power Board (Dinosaur) 6212XX →For older 1200s with serial 8981138 and below.
STEP 4
Measure the board’s output
Unplug the wire harness at the power board’s P1 connector. Measure DC volts across P1-1 and P1-6 on the board.
Is there voltage output?
Replace the power board
Power is going in but not coming out. Replace the power board.
Norcold Power Board 628661 →OEM board for every 1210, and 1200s with serial 8981139 and above. Norcold Upgraded Power Board (Dinosaur) 6212XX →For older 1200s with serial 8981138 and below.PART B · WIRE HARNESS & DISPLAY
The board is fine. Now follow the power to the display.
STEP 5
Measure with the harness plugged in
Plug the harness back into P1. Measure across the Yellow/Green and Green wire terminals.
Is there voltage output?
Fix the P1 connection
The harness isn’t fully plugged in and locked into P1, or a wire terminal is loose or broken. Repair it, then measure again.
STEP 6
Measure at the display
Unclip the optical control assembly from the divider but leave it plugged into the harness. Measure across the Green and White/Violet wire terminals.
Is there voltage?
Fix the harness terminals
Look for loose or damaged terminals at the harness or the circuit board connector. Repair them, then measure again.
STEP 7
Test the ON/OFF button signal
Put the meter’s + probe on the Blue wire and the − probe on the White/Violet wire. Press and hold the ON/OFF button.
Is there voltage while you hold the button?
Check the harness, then the display
First make sure the harness is plugged onto the display board correctly and its terminals are tight. If there’s still no voltage with the button held, the display overlay has failed. Norcold’s fix is a new optical control display assembly. The part number depends on your model and serial number, and most are hard to find, so see our optical control options or ask a tech before you order anything.
STEP 8
Release the button
Let go of the ON/OFF button and watch the display.
Does the fridge power on?
Check the MODE button
If you can display and change the operating MODE, the controls are okay. If you can’t, the display’s overlay ribbon cable is plugged in incorrectly. Reseat it.
PART C · IT WON’T STAY ON
The button sends a signal, but the fridge doesn’t turn on.
STEP 9
Test the Blue wire
Unplug the harness at P1. Check the harness Blue wire for continuity end to end.
Does the Blue wire have continuity?
Repair the harness
Repair the broken wire if you can reach it. If not, ask a tech.
STEP 10
Test the White/Red wire
Check the harness White/Red wire for continuity end to end.
Does the White/Red wire have continuity?
Repair the harness
Repair the broken wire if you can reach it. If not, ask a tech.
STEP 11
Test the hold-on signal
Plug the harness back into P1. Put the + probe on the White/Red wire and the − probe on the White/Violet wire. Press and release the ON/OFF button.
Is there voltage after you release the button?
Repair, or ask a tech
Check the harness and connectors again. If you can’t find the problem, ask a tech.
STEP 12
Check the fridge
Look at the control panel.
Is the refrigerator ON?
Controls okay
The fridge is running and the controls are working.
Replace the optical control display
The signal reaches the display, but it won’t turn the fridge on. Norcold’s fix is a new optical control display assembly. The part number depends on your model and serial number, and most are hard to find, so see our optical control options or ask a tech before you order anything.
Still stuck? ask a tech with your model, serial number and the readings you got. We’ll confirm the part before you order.
Based on the Norcold 1200/1210 service manual, Blank Display troubleshooting flowchart.